
Solitics integrates with platforms like SendPost to ensure that customers are able to send emails in their workflows and see the performance of their emails on the Solitics app itself.
As a Solitics customer you may have multiple brands and each brand would be associated to a SendPost sub-account as a Provider within your Solitics account.
This can be structured with a single SendPost account with multiple sub-accounts or multiple SendPost accounts with a single sub-account in each one.
Your SendPost representative can help ensure your set up is optimal for your use case. The below instructions use a single SendPost account with multiple sub-accounts for setup but the process is the same if you have multiple SendPost accounts you would just need to set up each account individually.
For either set up, each of your sub-accounts (brands) you would be able to create multiple workflows and access SendPost email templates from within them for sending.
Getting Started:
In order to get started with SendPost please ask for an introduction from Solitics to SendPost or schedule a call here.
After your meeting completes and any commercials are finalized you will be introduced to your assigned SendPost team in a shared channel to begin your onboarding. This process will include the following:
Account Setup in SendPost:
- Start by setting up your SendPost account at https://app.sendpost.io/register. Once completed, notify your SendPost account manager so they can verify, unlock and upgrade your account for use.
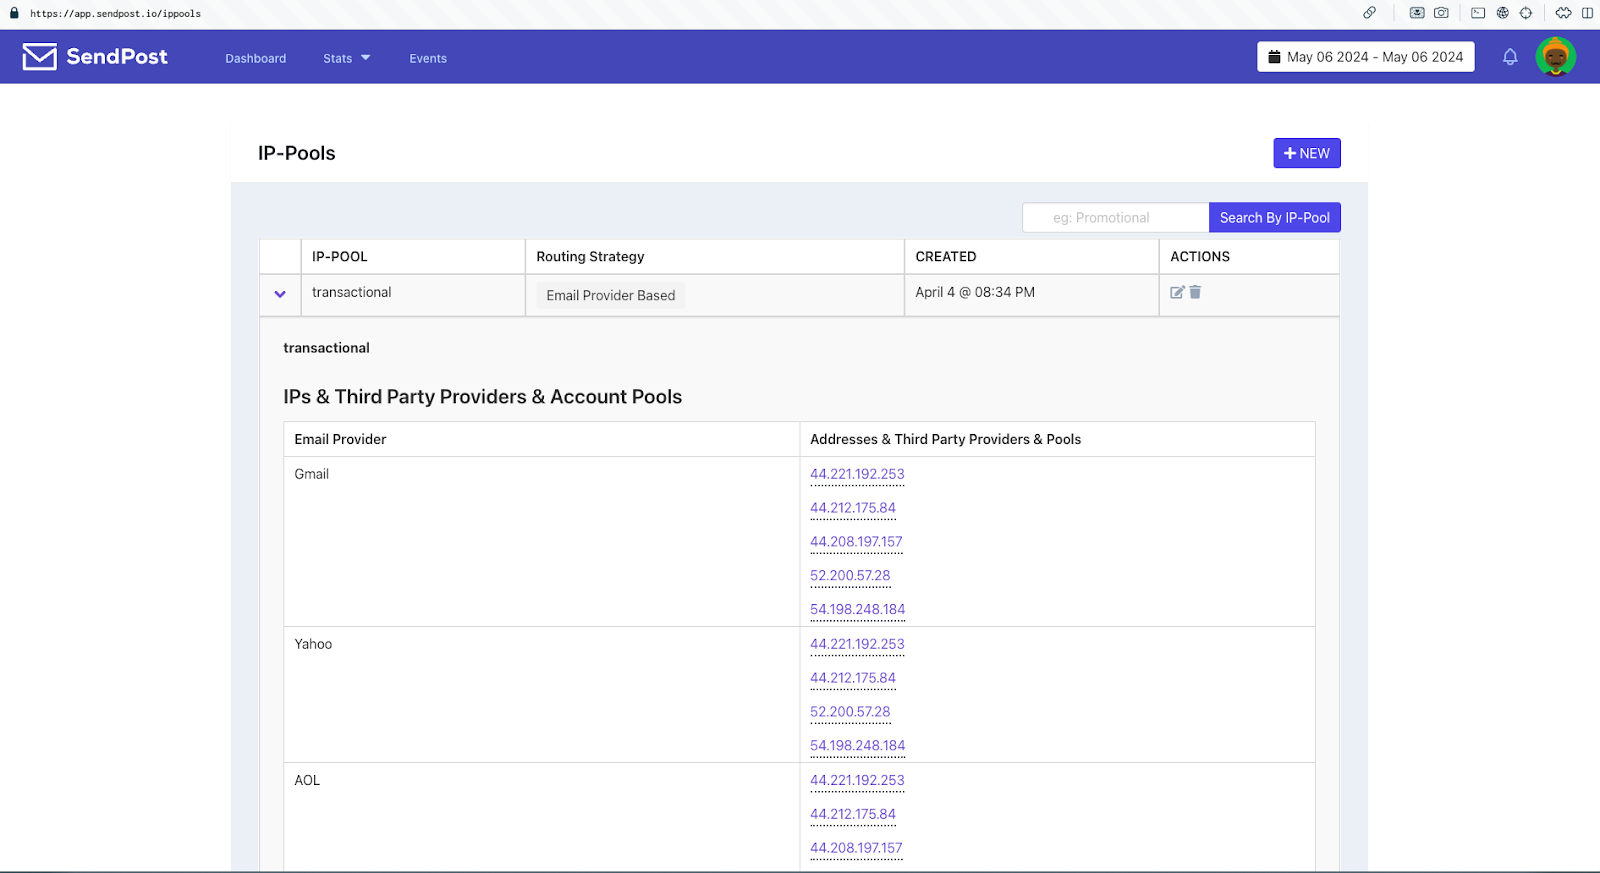
- Your SendPost account manager will then create an IP pool in your account with the name transactional. Please verify this has been created if your connection to Solitics has not yet been established please let Solitics know your IP pool has been created on the SendPost side.
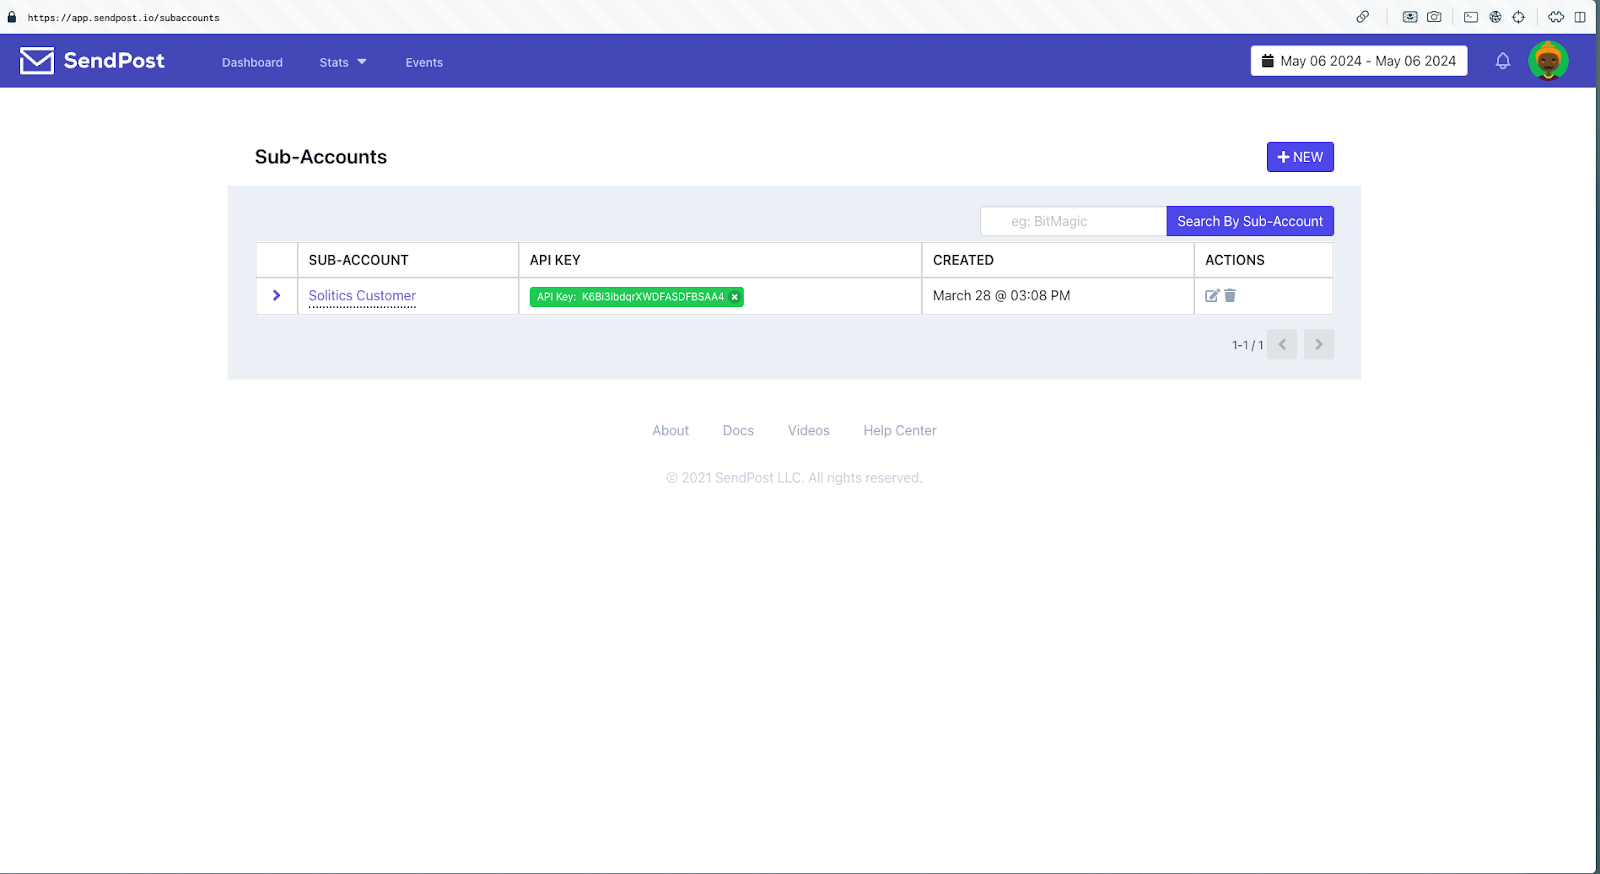
3. Next, create a Sub-Account for every brand from which emails need to be sent.
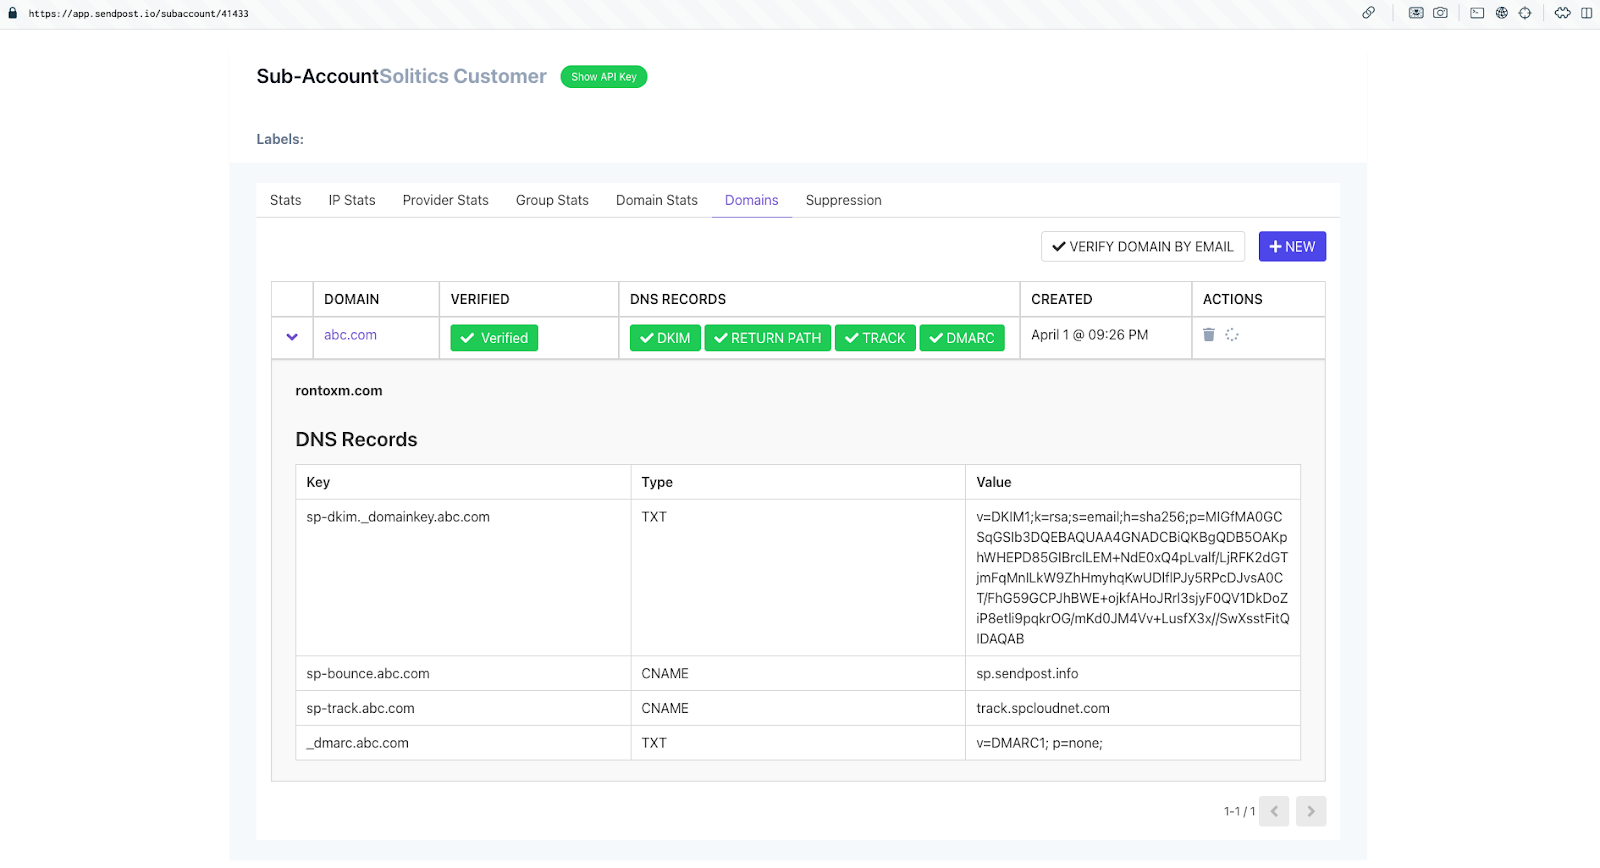
4. For every sub-account on SendPost please go to Domains and add a sending domain for each brand to generate DNS records to add to your zone records at your domain hosting provider for whitelisting. The scope of a domain is limited to a subaccount. Kindly ensure that you are selecting the correct sub account while adding the new domain. Once the domains are added and the DNS records have been added there will be green check mark and green colored indicator on the DNS record showing it has been successfully added.
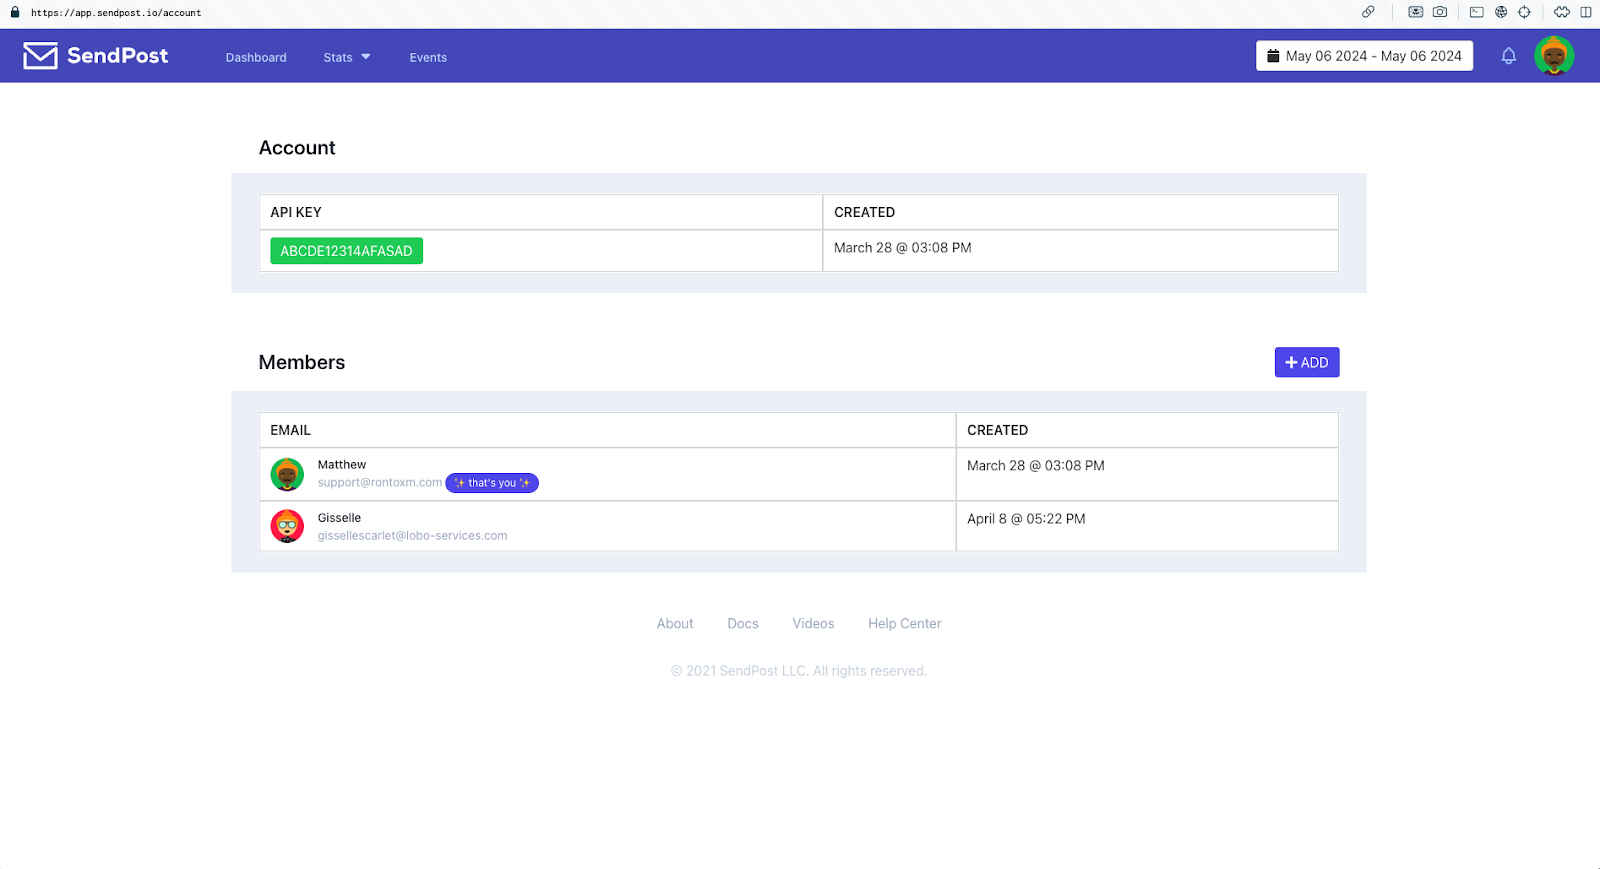
5. The next step is to share the Account API Keys and Sub-Account API Keys with the Solitics team. You can find those here:
-
- Profile picture > Account > API Key
- Profile picture > Sub-Accounts > click “Show API Key” next to corresponding sub-account
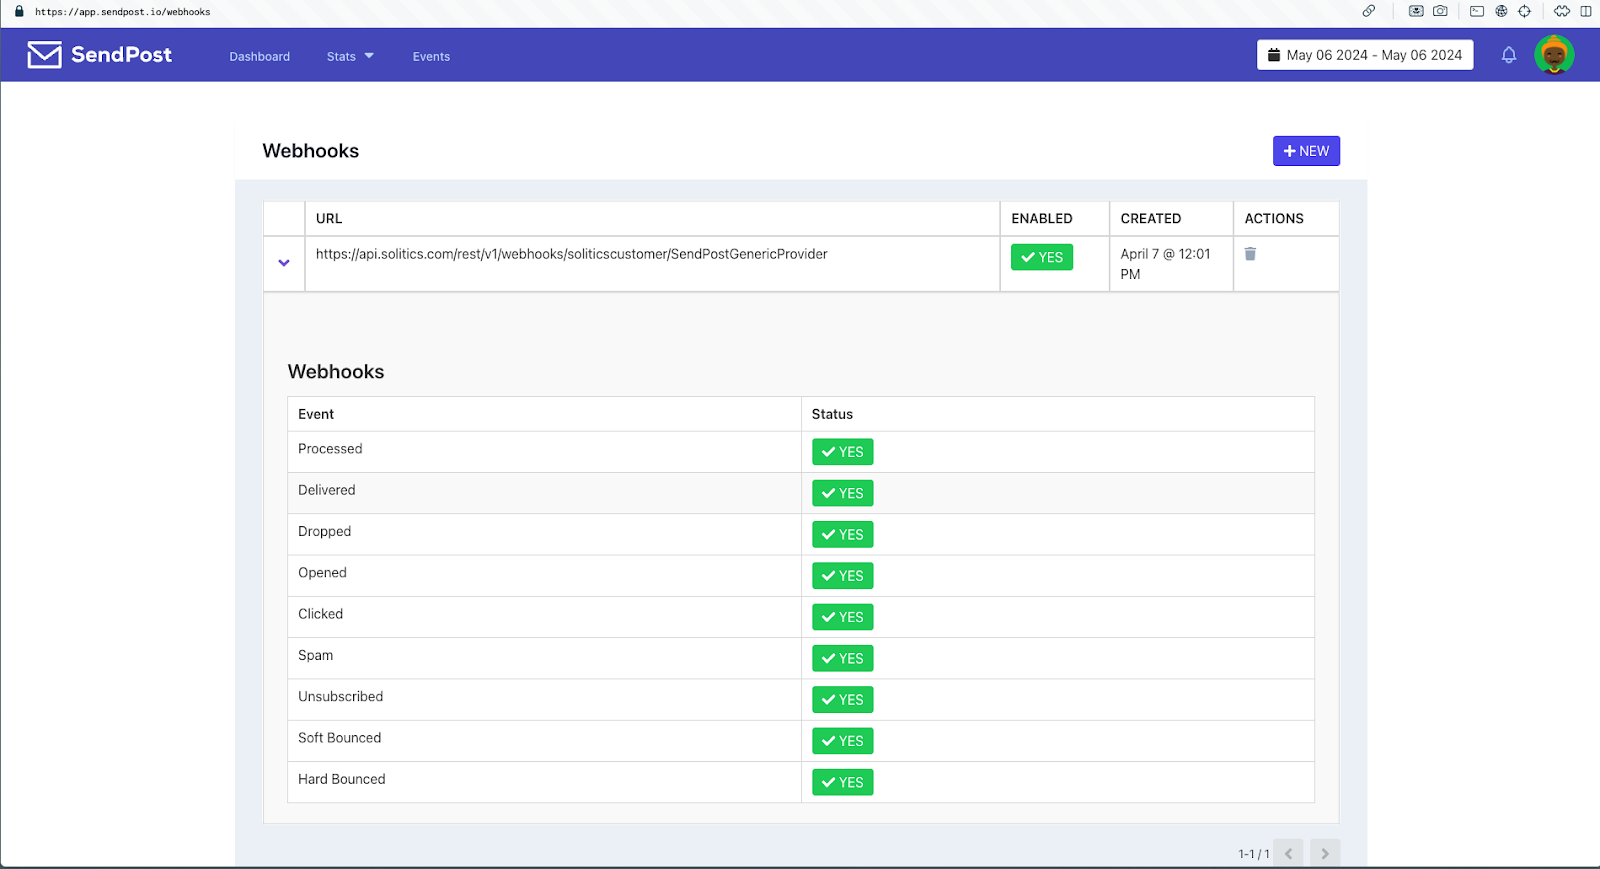
6. A webhook endpoint provided from Solitics needs to be added and enabled to which all the events such as sent, processed, opened, clicked, unsubscribed etc. need to be sent.
Example webhook:https://api.solitics.com/rest/v1/webhooks/{{yourSoliticsBrand}}/SendPostGenericProvider
Access webhooks at:
Setup in Solitics:
For your setup in Solitics please follow the below or refer to this article on Solitics help desk.
Next please activate the integration in your Solitics account by following these steps:
- Access the providers in ‘Settings’ log, and then selecting the ‘Providers’ configuration area.:
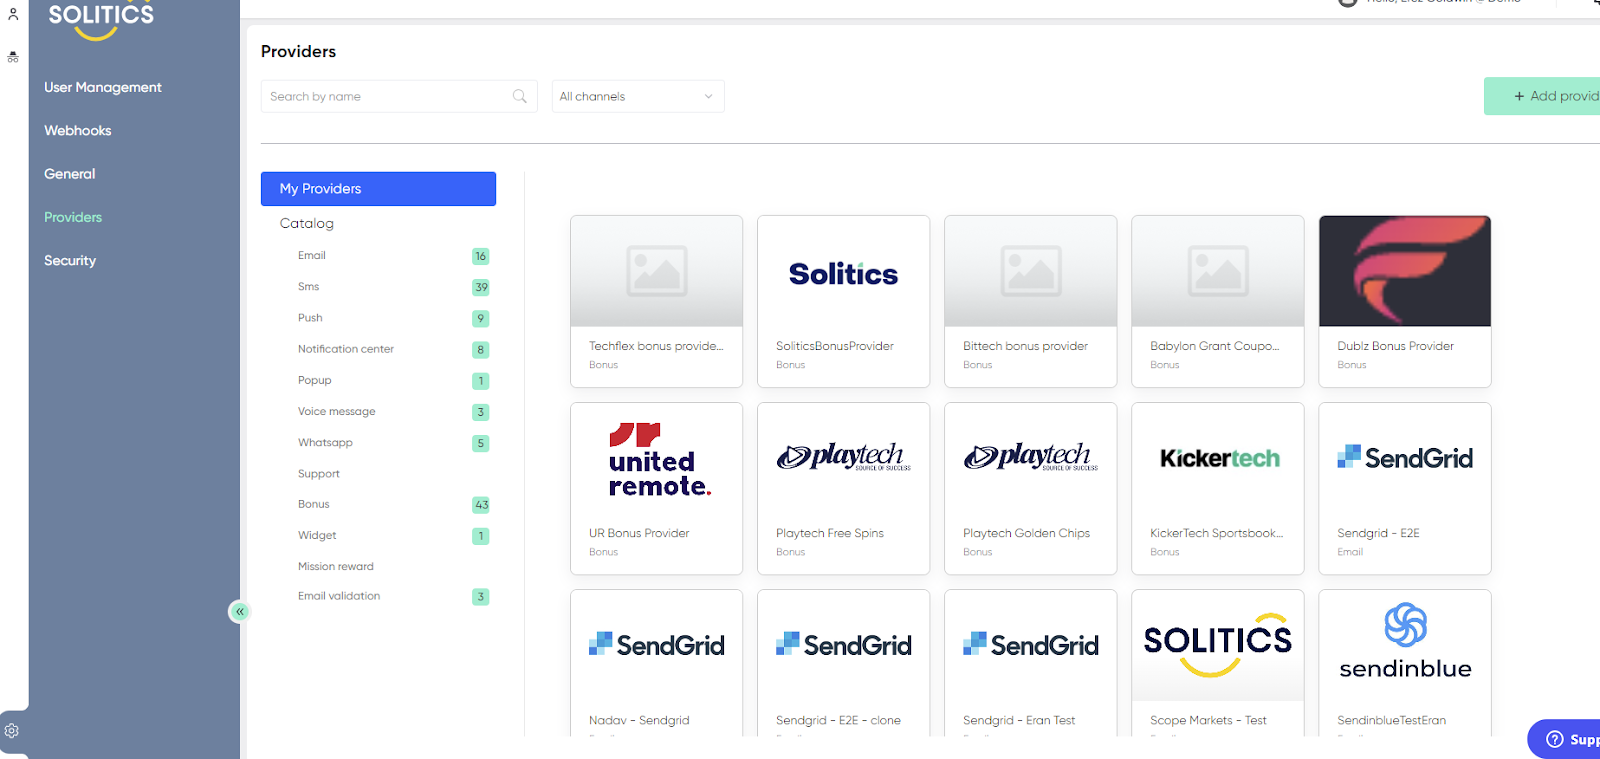
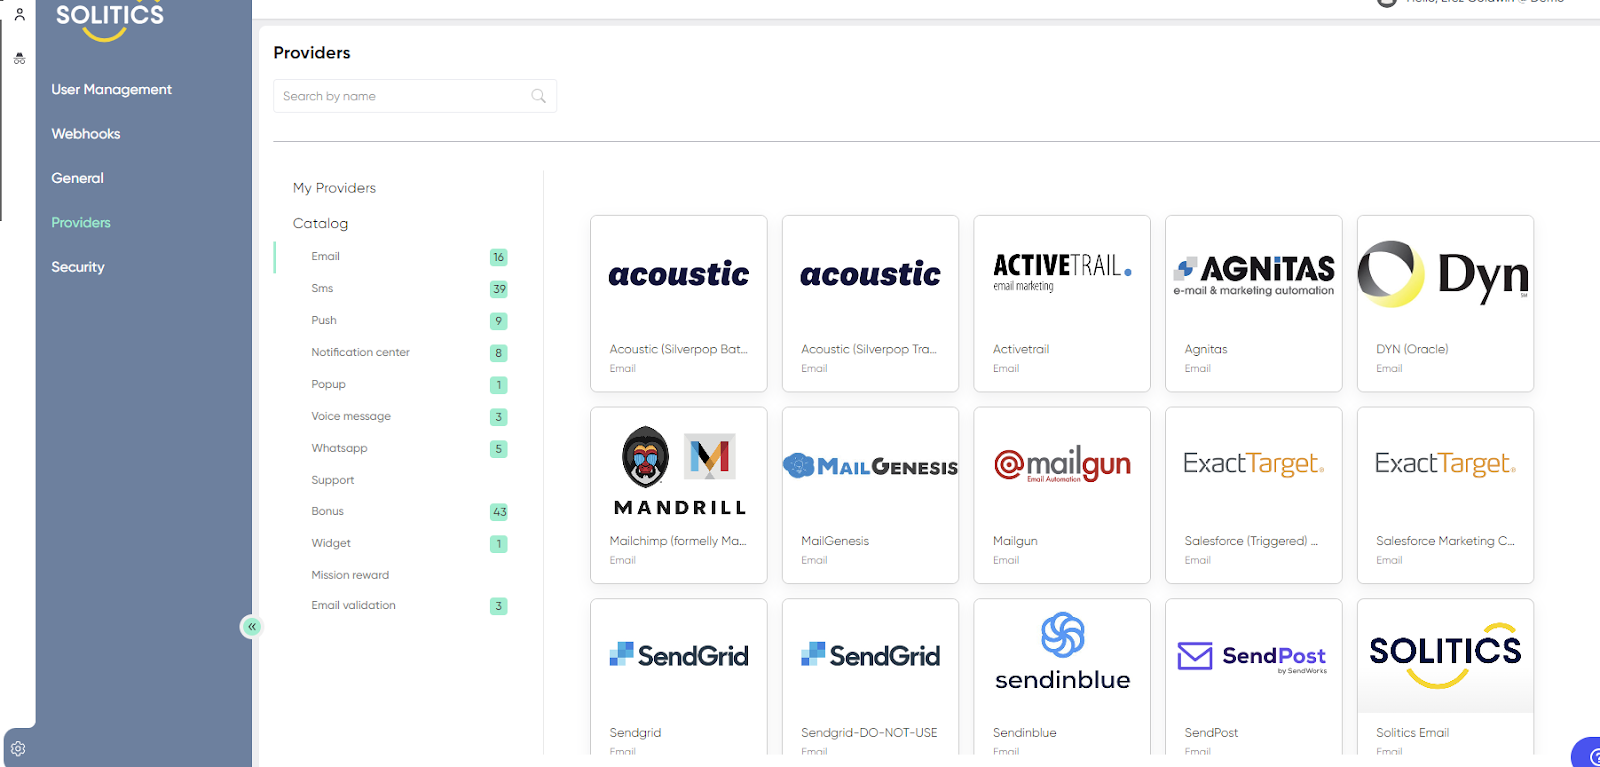
2. After that, select SendPost as your Provider:
3. Once you have selected SendPost as your Provider, you will be prompted to input the following information:
- Name your SendPost account
- based on Sub-account name in SendPost
- Enter your Account API key
- Found in SendPost under Profile pic > Account
- Enter your Sub-Account API key
- Found in SendPost under Profile pic > Sub-Accounts (then select the toggle next to the associated sub-account)
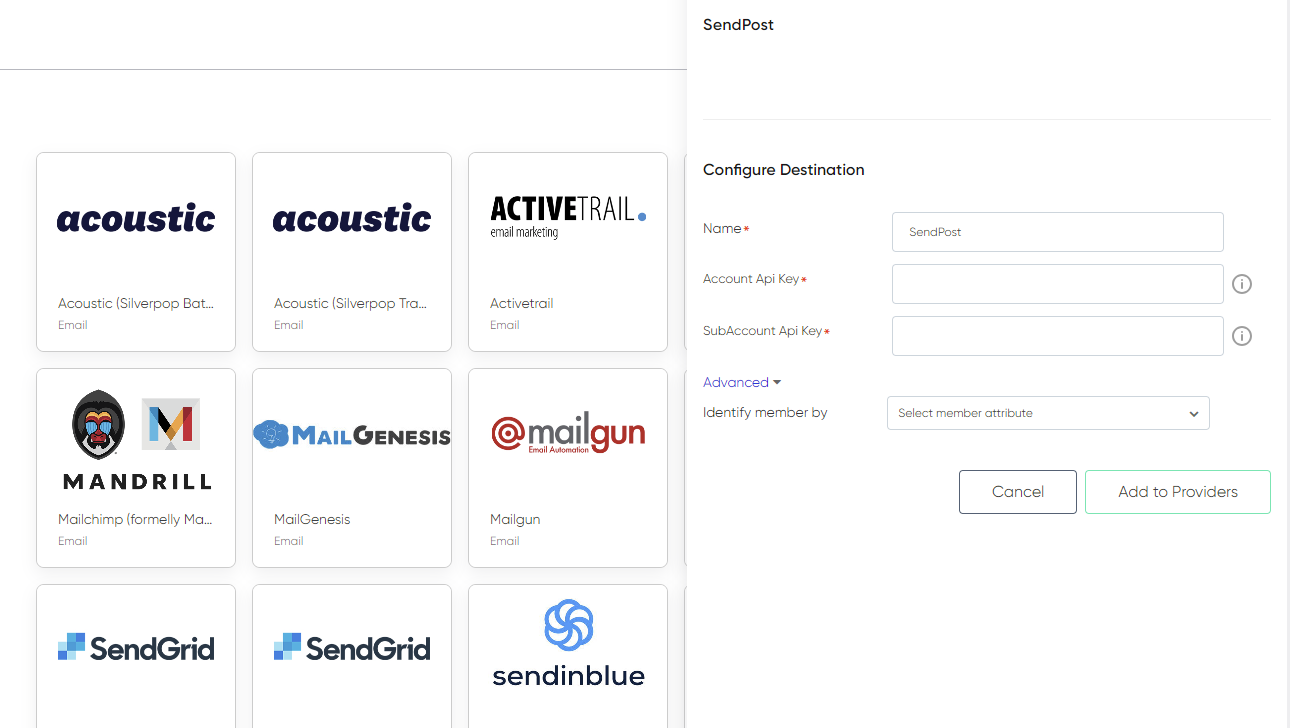
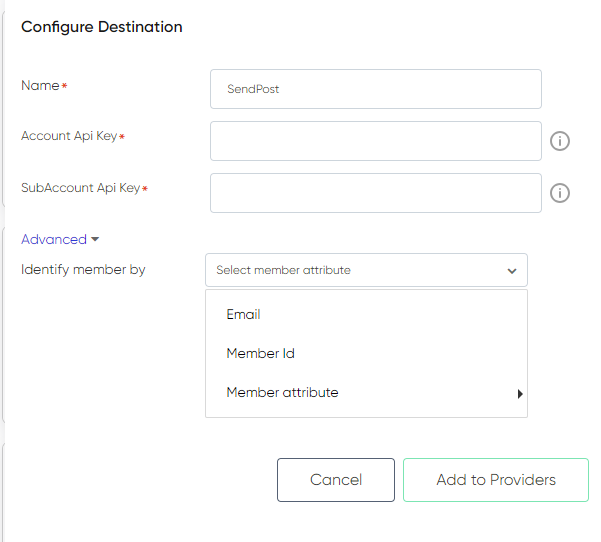
They can also select the way in which members are identified by-
Once that is done, the setup on the Solitics side is complete.
Confirming a Successful Solitics + SendPost Integrated Account Setup
To verify if the Solitics <> SendPost account setup has been done correctly, you should be able to do the following:
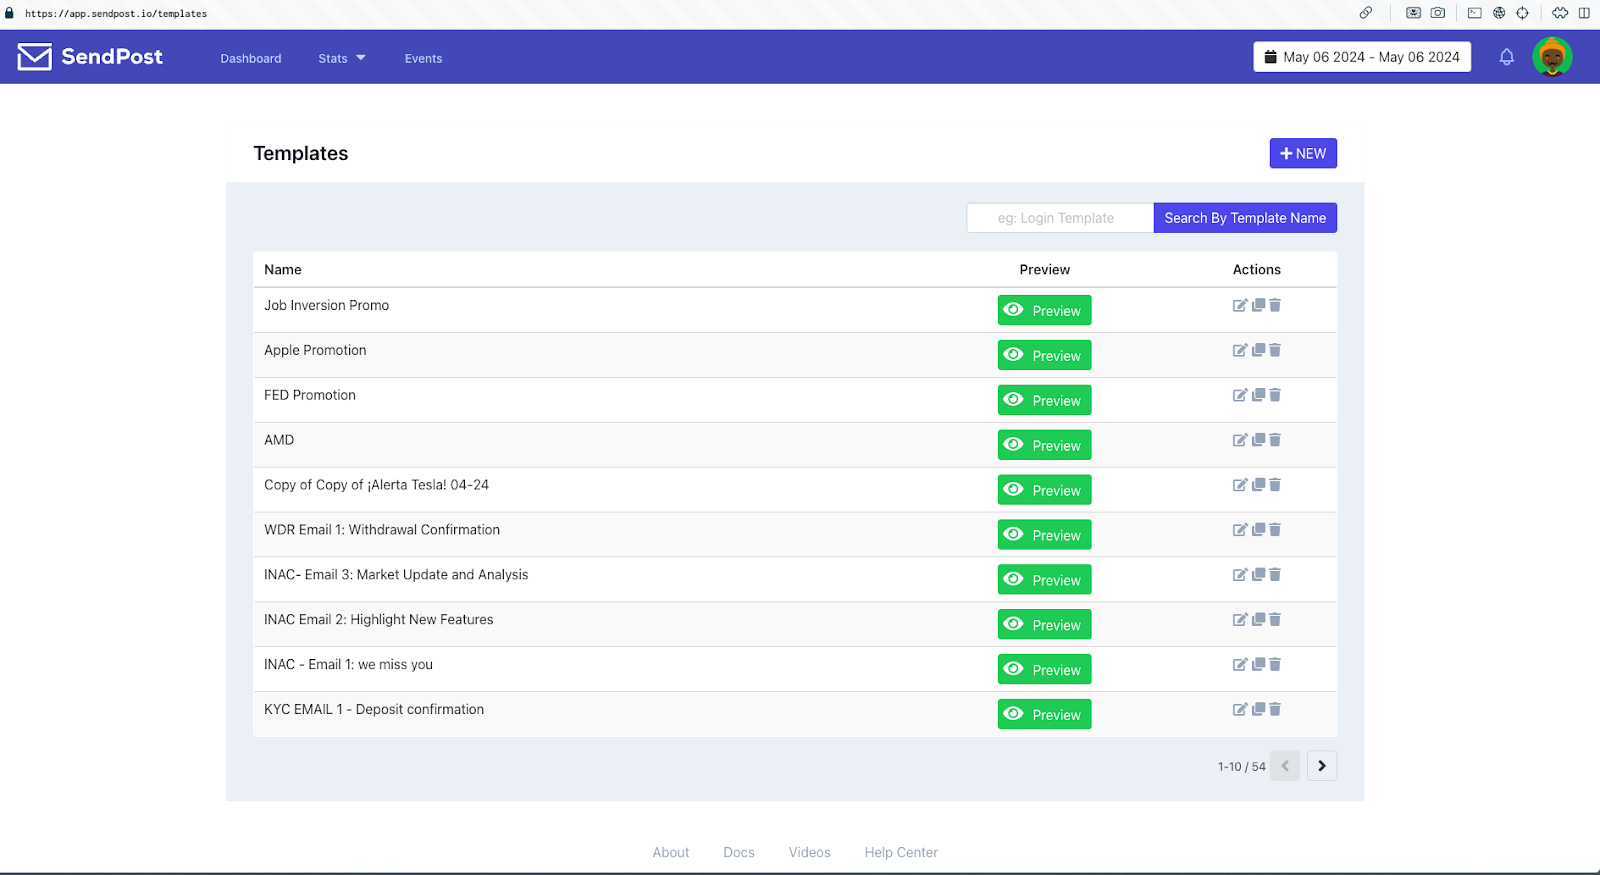
- Solitics customer should be able to see all the email templates while creating Solitics workflow and should be able to select them using their template name. The template HTML also will appear on Solitics workflow builder
- The emails are sent successfully from Solitics via SendPost. All the stats should correctly get updated at a subaccount and IP level on SendPost
- The Solitics customer should be able to see all the webhook events on their Solitics dashboard and in their Solitics CRM
Personalisation:
Unsubscription:
For SendPost to send unsubscription webhook, the below personalisation tag needs to be present in the email templates {{unsubscribe}}
Sample HTTP Post Body:
{
"from": {
"email": "tech@deals.secretflying.com"
},
"to": [
{ "email": "varun@sendx.io"}
],
"subject": "testing new smtp 18 ips nov 10",
"htmlBody": "Are you even receiving my emails? <a href='https://google.com'>Google</a> <a href='{{unsubscribe}}'> Get me off the list</a>",
"textBody": "Are you even receiving my emails?",
"trackClicks": true,
"trackOpens": true,
"ippool": "transactional"
}
Variable Replacement / If-Else condition and iterating over objects:
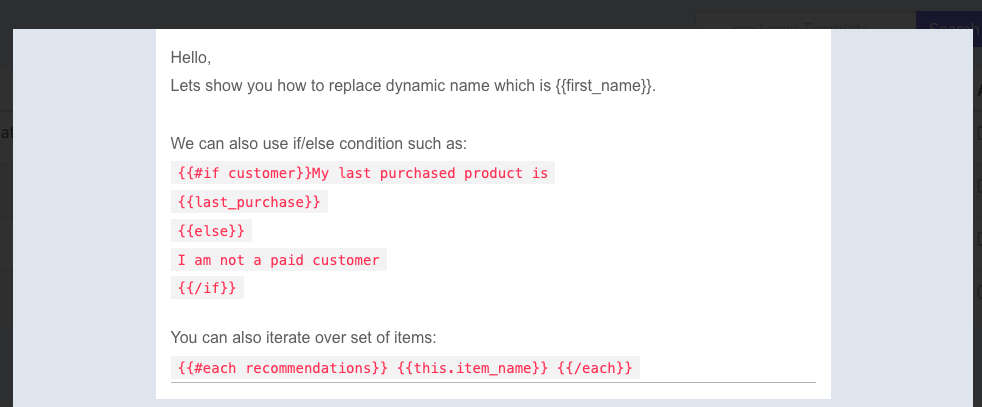
Any variable that needs to be replaced, needs to be passed in {{}} such as {{firstname}} or {{phonenumber}} or {{address}}. Note that these fields need to be specified during the API call as custom fields via Solitics
For using if/else condition the below syntax can be used:
{{#if customer}}
My last purchased product is {{last_purchase}}
{{else}}
I am not a paid customer
{{/if}}
For iterating over objects the below syntax can be used:
{{#each recommendations}}
{{this.item_name}}
{{/each}}